Clash X Tutorial
From beginner to expert, easily master proxy configuration

Sponsored
1. Core Concepts
Before you start, understanding how ClashX works will help you configure it better.
How It Works
ClashX is a rule-based proxy client. Unlike traditional VPNs (global encrypted tunnels), ClashX operates at the application layer (System Proxy) or network layer (TUN Mode), using preset rule lists to determine where each network request should go.
Configuration File (YAML)
The core of ClashX is the config.yaml file. This file defines three main parts:
- Proxies: Defines proxy server information (IP, port, encryption method).
- Proxy Groups: Groups nodes together, e.g., "Auto Select", "Manual Select", "Apple Services", etc.
- Rules: Defines traffic matching logic, e.g.,
DOMAIN-SUFFIX,google.com,Proxy.
1. Installation Tutorial
Three simple steps to quickly install Clash X
Download App
Visit the download page, select the version for your system and download.
Install App
- Double-click the downloaded .dmg file
- Drag the Clash X icon to the "Applications" folder
- Find Clash X in the "Applications" folder and double-click to open
Grant Permissions (Visual Guide)
ClashX is not Apple-signed, so macOS will show a security warning on first launch. This is standard behavior for all unsigned macOS apps — it does not mean ClashX is unsafe. Follow these steps:
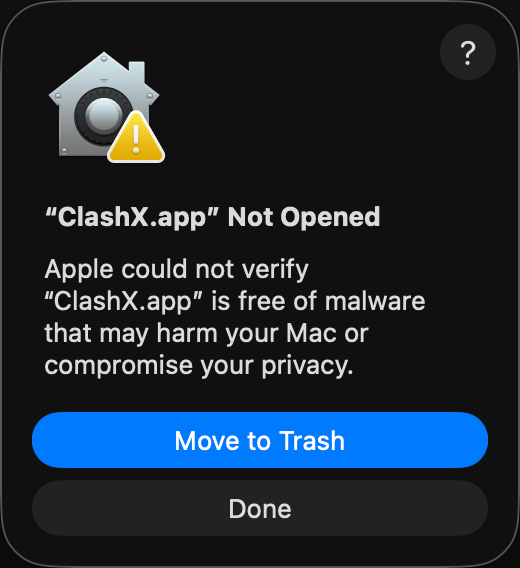
① Double-click to open — Security alert appears
This dialog appears for all unsigned apps — it's a normal macOS response.
👉 Click "Done" (do NOT click "Move to Trash")
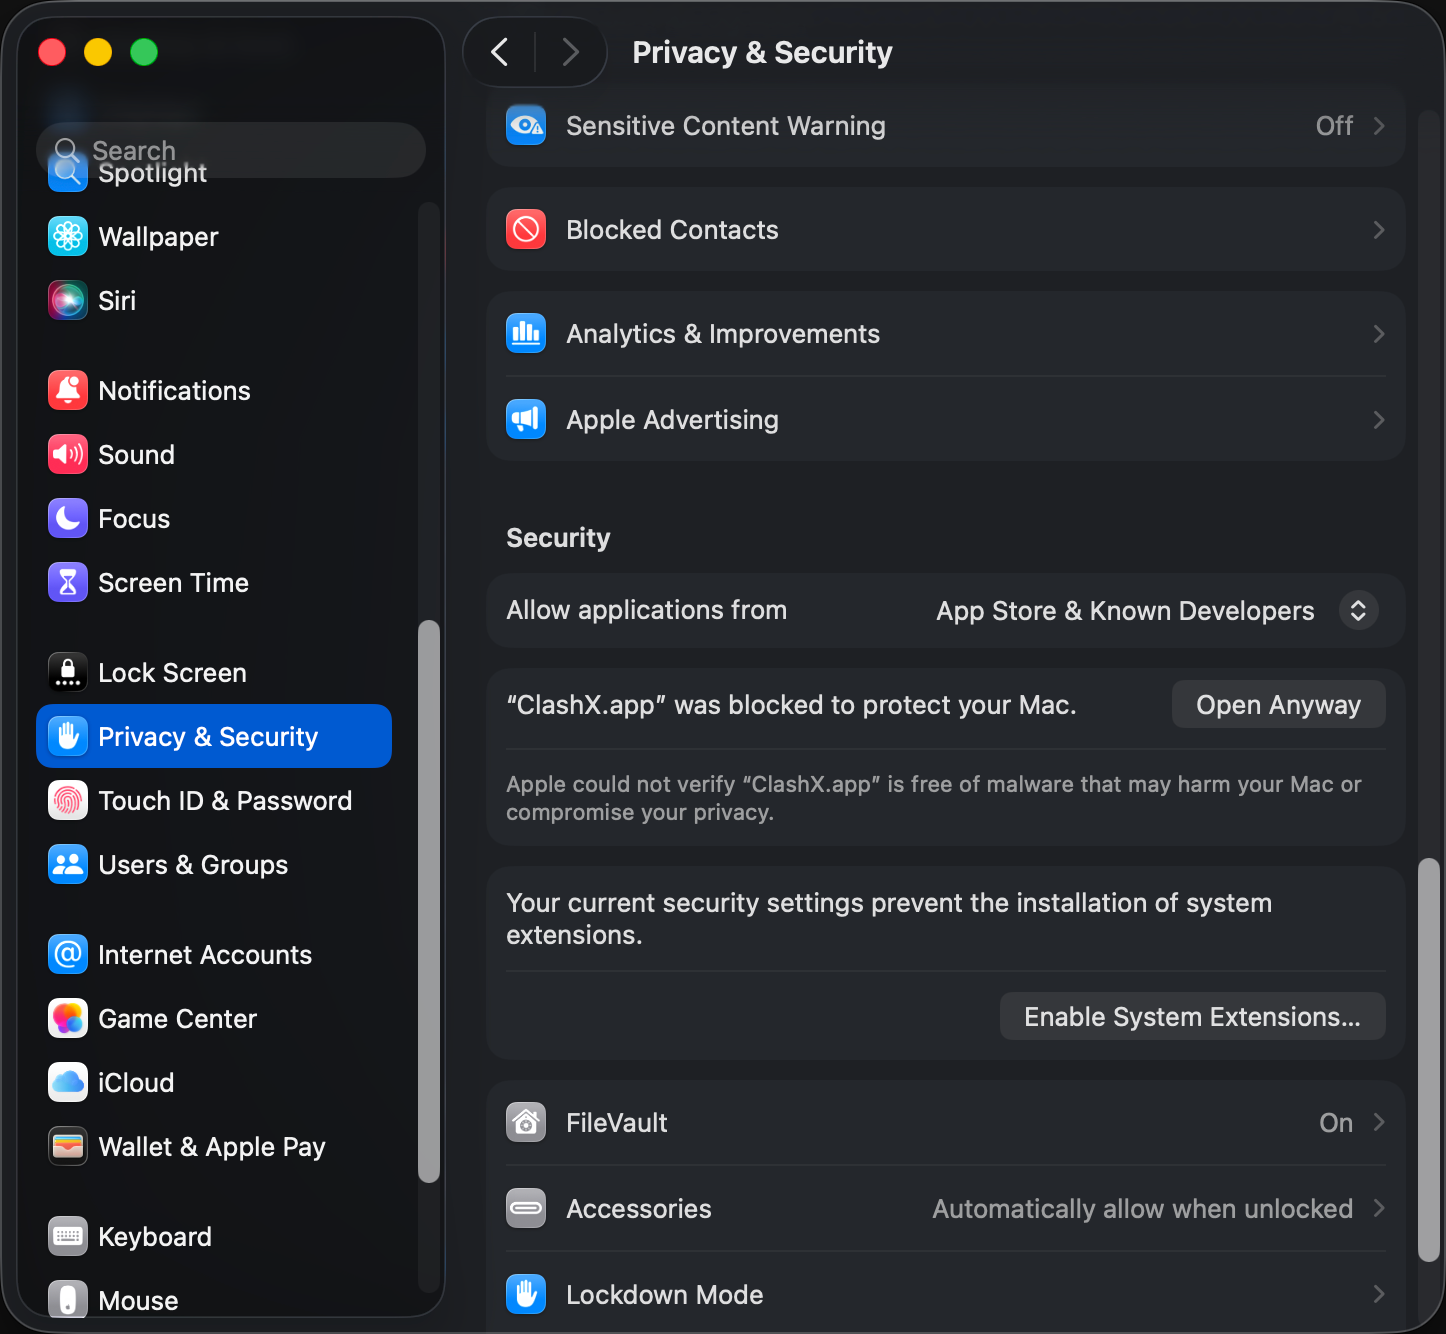
② System Settings → Privacy & Security
Open System Settings → Privacy & Security, scroll down to find "ClashX was blocked to protect your Mac".
👉 Click "Open Anyway"
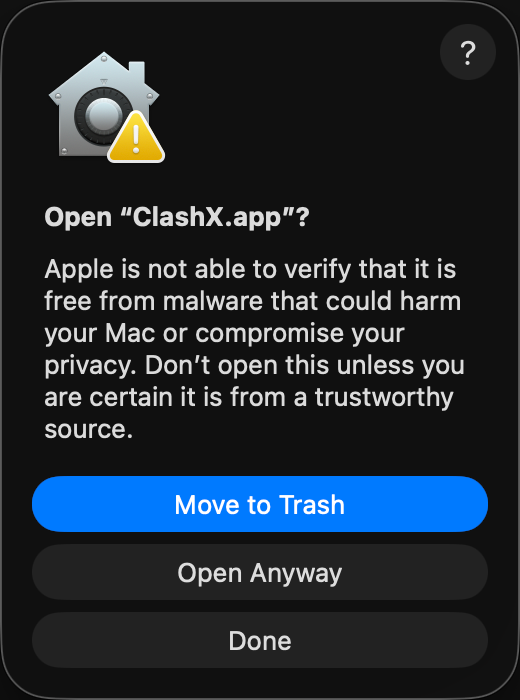
③ Confirm opening
Final macOS confirmation. After this, ClashX will open without warnings.
👉 Click "Open Anyway"
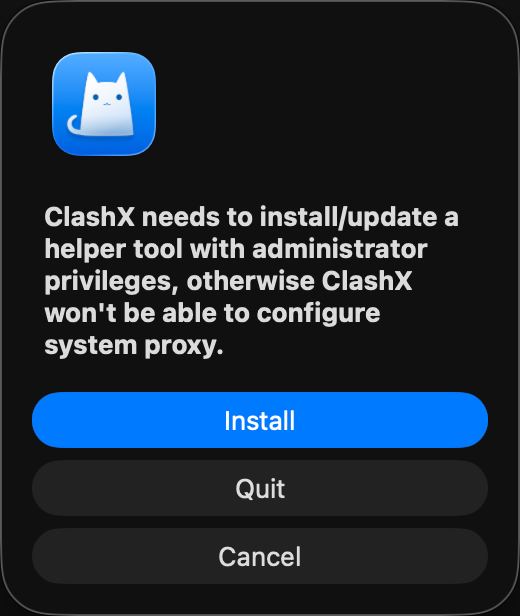
④ Install helper tool
ClashX needs a helper tool to configure the system proxy. Without it, system proxy won't work.
👉 Click "Install", then enter your Mac password
💡 Alternative: One-command fix in Terminal
If you're comfortable with Terminal, run this command to skip the steps above:
sudo xattr -rd com.apple.quarantine /Applications/ClashX.app2. Basic Configuration
Complete initial setup and get ready to use
Launch Clash X
After opening the app, you will see the Clash X icon (a cat icon) in the menu bar. Click the icon to see the main menu.
Initial Setup
- Click the menu bar icon
- Select "Config" → "Open Config Folder"
- Place your configuration file (.yaml) in this folder
- Return to the menu and select your config file under "Config"
3. Subscription Settings
Use subscription links to automatically update node configurations
Add Subscription Link
Subscription links are the most convenient configuration method and can automatically update node information.
Update Subscription
Subscription links can be updated regularly to get the latest node information:
Manual Update
Config menu → Select config → Click "Update"
Auto Update
Set update interval in managed config
4. Proxy Modes
Understand three proxy modes and choose the one for your use case
Global Mode
All traffic goes through proxy, suitable for scenarios that require full proxy.
Rule Mode
Automatically determine whether to use proxy based on rules, intelligent traffic routing, recommended.
Direct Mode
All traffic goes direct without proxy. Used to temporarily disable proxy.
Switch Proxy Mode
Click the Clash X icon in the menu bar and select the desired mode under "Outbound Mode".
5. Rule Configuration
Customize traffic rules to precisely control proxy behavior
Rule Explanation
Rules are used to determine which traffic should go through proxy and which should go direct. Common rule types:
DOMAIN-SUFFIX
Domain suffix matching
DOMAIN-KEYWORD
Domain keyword matching
IP-CIDR
IP address range matching
GEOIP
Geographic location matching
Custom Rules
Edit the configuration file and add custom rules in the rules section:
rules:
  - DOMAIN-SUFFIX,google.com,Proxy
  - DOMAIN-KEYWORD,youtube,Proxy
  - GEOIP,CN,DIRECT
- MATCH,Proxy6. Advanced Features
Master these advanced features for a better experience
Dashboard Control Panel
Clash X provides a web control panel to monitor traffic and connection status in real time:
- Menu bar → Click "Dashboard"
- Browser will automatically open the control panel
- View real-time traffic, connection count, rule matching and other information
Speed Test
Test node latency and select the fastest node:
- Menu bar → Proxy → Select policy group
- Click "Speed Test" button
- Wait for completion, the node with lowest latency will be selected
Enhanced Mode
Enabling enhanced mode can proxy more types of traffic:
- Menu bar → "Set as System Proxy" (check)
- Menu bar → "Enhanced Mode" (check)
8. Security & Privacy
Learn how to use ClashX securely to protect your network privacy.
Local Encryption
As a local proxy client, ClashX performs all rule matching and routing decisions locally on your Mac. Your raw traffic data is not uploaded to any third-party servers (except the proxy servers you configure).
DNS Leak Protection
To prevent DNS pollution and privacy leaks, it is recommended to enable DNS encryption (DoH or DoT) in your configuration file. ClashX supports taking over system DNS requests to ensure your domain resolution process is also encrypted.
7. Common Questions
Quickly find solutions to common problems
Why can't I connect?
+Please check the following:
- Is the configuration file format correct?
- Is the subscription link valid?
- Is the node available (try switching to other nodes)?
- Is the system proxy setting correct?
- Is the firewall blocking Clash X?
How to fix slow speed issues?
+You can try the following:
- Use speed test to select nodes with low latency
- Switch to different nodes
- Check local network status
- Contact service provider
Icon not showing after startup?
+The menu bar icon may be hidden:
- Hold ⌘ (Command) key and drag icon to adjust position
- Check menu bar settings in system preferences
- Restart the app
How to uninstall Clash X?
+Complete uninstallation steps:
- Quit Clash X (Menu → Quit)
- Delete /Applications/ClashX.app
- Delete config files: ~/.config/clash
- Check system proxy settings to ensure they are restored to default
Quick Terminal Proxy Setup for Developers
Fix the common issue where the browser works but terminal tools time out
- Enable TUN mode first to unify terminal and GUI traffic routing.
- If you are not using TUN yet, explicitly set
http_proxyandhttps_proxyin your shell. - For intermittent failures, troubleshoot with the connection timeout guide and the DNS checklist together.
Further Reading
Explore more ClashX features and tips
TUN Mode Setup
Fix permission issues and enable enhanced mode
YAML Configuration Guide
Understand the configuration file structure
Subscription Link Setup
Import node configurations in one click
Connection Troubleshooting
Resolve common reasons why ClashX cannot connect
TUN Mode Troubleshooting
In-depth TUN diagnostics on the ClashX Pro tutorial site
Recommended Companion Tools
Pair with ClashX for different networking scenarios
GearUP Game Booster
10% OFF — Code: CLASHXAIR smart routing for lower latency. Use ClashX for proxy routing, GearUP for gaming ping.
Learn More →Affiliate link · Disclosure
Saily Travel eSIM
By Nord Security. Instant data in 150+ countries, no SIM swaps, no roaming fees.
Learn More →Affiliate link · Disclosure
NordVPN Proxy Nodes
6000+ global servers for high-quality ClashX proxy nodes.
View NordVPN →Affiliate link · Disclosure